4L60E fluid change
62 images in this album on 5 pages.

Slideshow
Login
Login
Gallery: Family Photo Gallery navigate UP Album: Brent Franker navigate UP Album: Car Stuff! navigate UP Album: 1994 Vortech Supercharged Z28 navigate UP (accesskey 'U')
First Page  (Accesskey 'F') Previous Page (Accesskey 'P')
 leftdot 1  leftdot 2  leftdot 3  leftdot 4  leftdot 5  rightdot
Next Page (Accesskey 'N') Last Page (Accesskey 'L')
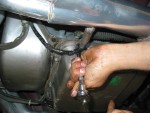
Install all the bolts in the tranny and just snug them up.  Don't tighten them at this point... yet!
Install all the bolts in the tranny and just snug them up. Don't tighten them at this point... yet!
Viewed: 912 times.
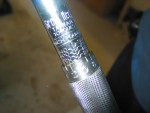
If you can, you'll want to torque the bolts with a torque wrench.  The bolts being used in my application are 8mm.  Bolts with 8mm threads are torqued to 120 in/lbs.  If you don't have a torque wrench to do this, hopefully you have a little experience in working on cars and can use your "elbow torque wrench" so as to not over or under tighten them :-)
If you can, you'll want to torque the bolts with a torque wrench. The bolts being used in my application are 8mm. Bolts with 8mm threads are torqued to 120 in/lbs. If you don't have a torque wrench to do this, hopefully you have a little experience in working on cars and can use your "elbow torque wrench" so as to not over or under tighten them :-)
Viewed: 1001 times.
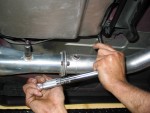
Torquing the bolts to 120 in/lbs.  If you're not doing a 4L60E transmission fluid change, your torque specs may be slightly different.
Torquing the bolts to 120 in/lbs. If you're not doing a 4L60E transmission fluid change, your torque specs may be slightly different.
Viewed: 1002 times.
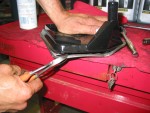
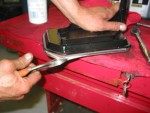
Grab the old filter that we set aside earlier and a pair of side cutters.  You can get a good idea of what is happening inside your tranny by inspecting the internals of the filter.  While many people just throw away their filters without even thinking twice, you can learn a lot by looking at the insides! These are easy to take apart too... just use the side cutters as pliers (more or less!) and while using a twisting and pulling motion, break the two pieces apart.
Grab the old filter that we set aside earlier and a pair of side cutters. You can get a good idea of what is happening inside your tranny by inspecting the internals of the filter. While many people just throw away their filters without even thinking twice, you can learn a lot by looking at the insides! These are easy to take apart too... just use the side cutters as pliers (more or less!) and while using a twisting and pulling motion, break the two pieces apart.
Viewed: 1029 times.
Grab the old filter that we set aside earlier and a pair of side cutters.  You can get a good idea of what is happening inside your tranny by inspecting the internals of the filter.  While many people just throw away their filters without even thinking twice, you can learn a lot by looking at the insides! These are easy to take apart too... just use the side cutters as pliers (more or less!) and while using a twisting and pulling motion, break the two pieces apart.
Grab the old filter that we set aside earlier and a pair of side cutters. You can get a good idea of what is happening inside your tranny by inspecting the internals of the filter. While many people just throw away their filters without even thinking twice, you can learn a lot by looking at the insides! These are easy to take apart too... just use the side cutters as pliers (more or less!) and while using a twisting and pulling motion, break the two pieces apart.
Viewed: 921 times.
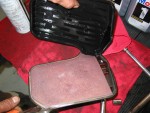
With the two pieces pulled apart you can now see the entire filter.  However, the "good stuff" is in the middle of the filter.
With the two pieces pulled apart you can now see the entire filter. However, the "good stuff" is in the middle of the filter.
Viewed: 963 times.
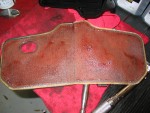
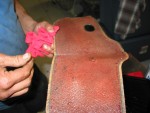
With the filter opened up you can see what has been being filtered.  You can look for converter material and basically "chunks" of stuff.  The dark around the edges is normal and what you see here is pretty typical of a normal wear in the tranny.  If you have any questions or concerns about what you find in your filter, ask a buddy who might know or even take the filter to a tranny shop for them to inspect.  You might be able to find some serious things about to go wrong in your tranny by inspecting this filter and it will be better for you to get it repaired asap than to get stranded someday on the side of the road!
With the filter opened up you can see what has been being filtered. You can look for converter material and basically "chunks" of stuff. The dark around the edges is normal and what you see here is pretty typical of a normal wear in the tranny. If you have any questions or concerns about what you find in your filter, ask a buddy who might know or even take the filter to a tranny shop for them to inspect. You might be able to find some serious things about to go wrong in your tranny by inspecting this filter and it will be better for you to get it repaired asap than to get stranded someday on the side of the road!
Viewed: 957 times.
With the filter opened up you can see what has been being filtered.  You can look for converter material and basically "chunks" of stuff.  The dark around the edges is normal and what you see here is pretty typical of a normal wear in the tranny.  If you have any questions or concerns about what you find in your filter, ask a buddy who might know or even take the filter to a tranny shop for them to inspect.  You might be able to find some serious things about to go wrong in your tranny by inspecting this filter and it will be better for you to get it repaired asap than to get stranded someday on the side of the road!
With the filter opened up you can see what has been being filtered. You can look for converter material and basically "chunks" of stuff. The dark around the edges is normal and what you see here is pretty typical of a normal wear in the tranny. If you have any questions or concerns about what you find in your filter, ask a buddy who might know or even take the filter to a tranny shop for them to inspect. You might be able to find some serious things about to go wrong in your tranny by inspecting this filter and it will be better for you to get it repaired asap than to get stranded someday on the side of the road!
Viewed: 992 times.
IMG_4203.JPG
IMG_4203.JPG
Viewed: 933 times.
IMG_4204.JPG
IMG_4204.JPG
Viewed: 927 times.
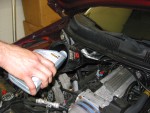
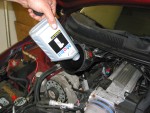
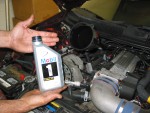
Add the necessary amount of Mobil 1 ATF fluid through the dipstick in the engine compartment.  A normal 4L60E in a Z28 would take around 4 to 5 qts just for a normal changout of the fluid.  It is important to remember here that much of the tranny fluid will stay in the torque converter and there is really no way to get it out when performing your own tranny fluid change so you'll be mixing your new ATF with the older ATF that was in there.  This is OK and it is even OK to mix synthetic and normal ATF if you decide to switch to Mobil 1 synthetic ATF.  In my case I am using a deep pan which takes about 2 qts more than a normal pan.  However, I also have a Vigilante 2800 converter which is slightly smaller than stock so for me, the total I needed to add was 5.5 qts :)
Add the necessary amount of Mobil 1 ATF fluid through the dipstick in the engine compartment. A normal 4L60E in a Z28 would take around 4 to 5 qts just for a normal changout of the fluid. It is important to remember here that much of the tranny fluid will stay in the torque converter and there is really no way to get it out when performing your own tranny fluid change so you'll be mixing your new ATF with the older ATF that was in there. This is OK and it is even OK to mix synthetic and normal ATF if you decide to switch to Mobil 1 synthetic ATF. In my case I am using a deep pan which takes about 2 qts more than a normal pan. However, I also have a Vigilante 2800 converter which is slightly smaller than stock so for me, the total I needed to add was 5.5 qts :)
Viewed: 1171 times.
Nothing but the best!
Viewed: 961 times.
After you have added the correct amount of fluid, you'll want to check it!  Start the car up and go through the gears a couple of times.  Leave the car running and in Park and check the dipstick for proper level.
After you have added the correct amount of fluid, you'll want to check it! Start the car up and go through the gears a couple of times. Leave the car running and in Park and check the dipstick for proper level.
Viewed: 1014 times.
IMG_4208.JPG
IMG_4208.JPG
Viewed: 1012 times.
The Trans Fluid dipstick should be clearly labeled.  Make sure you aren't adding fluid to the Engine Oil dipstick area! :-)
The Trans Fluid dipstick should be clearly labeled. Make sure you aren't adding fluid to the Engine Oil dipstick area! :-)
Viewed: 1077 times.
First Page  (Accesskey 'F') Previous Page (Accesskey 'P')
 leftdot 1  leftdot 2  leftdot 3  leftdot 4  leftdot 5  rightdot
Next Page (Accesskey 'N') Last Page (Accesskey 'L')
Gallery: Family Photo Gallery navigate UP Album: Brent Franker navigate UP Album: Car Stuff! navigate UP Album: 1994 Vortech Supercharged Z28 navigate UP (accesskey 'U')
Powered by Gallery v1
RSS